

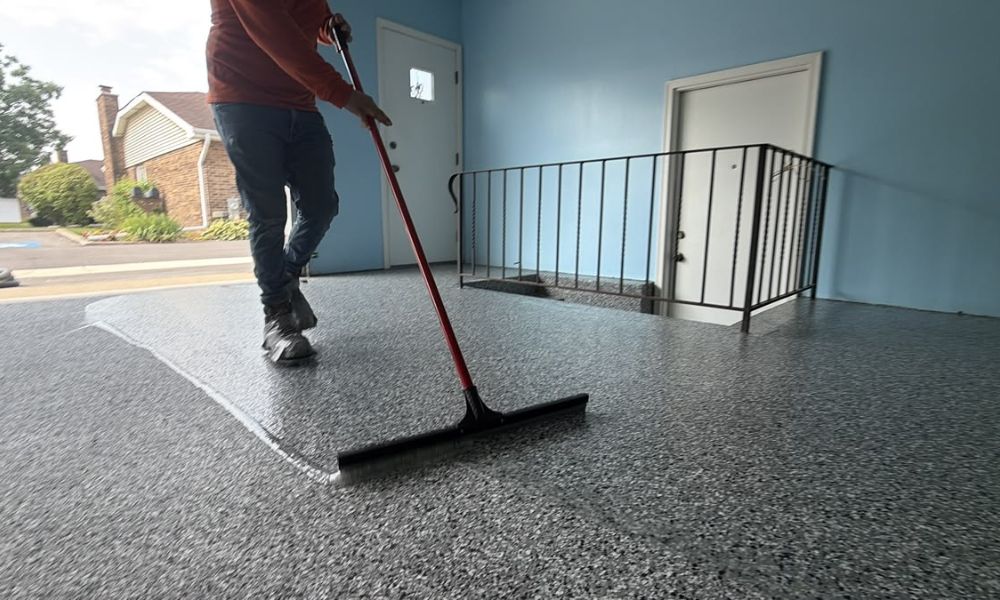
To coat a garage floor with epoxy, you inspect and prepare the concrete, clean and degrease the surface, mechanically profile it, repair any damage, verify moisture levels, apply the epoxy system in sections, broadcast decorative flakes or slip-resistant aggregate, apply a compatible topcoat, and allow the floor to fully cure before use.
Garage epoxy flooring has become one of the most practical upgrades a homeowner can make. It can protect concrete from oil, chemicals, and abrasion while creating a surface that is easier to clean and more visually finished than bare slab. For Maui homeowners and vacation rental owners, the case for epoxy is strong — but so are the environmental factors that can compromise a poor installation. Tropical humidity, coastal salt air, intense UV exposure, and tracked-in sand all place real demands on a coating system.
Getting this right starts well before a brush or roller touches the floor. The quality of the finished surface depends almost entirely on what happens during preparation.
What You Need Before Coating a Garage Floor With Epoxy
A successful installation requires more than the coating itself. You will need a compatible epoxy system (primer, basecoat, and topcoat), surface preparation equipment, concrete crack repair materials, application tools (rollers, brushes, squeegees), and appropriate personal protective equipment (PPE) including a NIOSH-approved respirator, chemical-resistant gloves, and safety glasses.
According to CDC/NIOSH guidance (via cpwr.com), working with epoxy resin systems requires a NIOSH-approved respirator and maximum ventilation. Review the Safety Data Sheet (SDS) for every product before you open a container.
Optional but recommended: decorative flake systems, slip-resistant aggregate, and a UV-stable topcoat — all of which are particularly relevant in Maui’s high-UV, high-traffic conditions.
Step 1 — Inspect and Prepare the Concrete
Start by assessing the concrete’s condition. Look for existing coatings, cracks, spalling, oil contamination, and surface deterioration. Concrete must be fully cured — a minimum of 28 days — before any coating is applied (Excellent Coatings International). Do not apply epoxy over concrete with high moisture content or active water infiltration.
Check for existing coatings by taping down plastic sheeting overnight. Moisture beading beneath the plastic, or a powdery surface, are signs that additional preparation or moisture testing is needed.
Step 2 — Clean and Degrease the Garage Floor
Oil, grease, dirt, dust, and contaminants must be fully removed before any mechanical preparation begins. Degreasers and concrete cleaners can address most surface contamination, but heavily oil-saturated slabs may require multiple treatment cycles or grinding to remove contaminated concrete entirely.
In Maui garages, salt residue from coastal air can accumulate on concrete surfaces. Rinsing thoroughly and confirming the surface is free of residual salts before proceeding can help prevent adhesion failures later.
Step 3 — Mechanically Prepare the Surface
Surface profile is one of the most critical factors in epoxy coating and installation adhesion. According to ICRI Technical Guideline No. 310.2R-2013 (via defelsko.com), the concrete surface profile (CSP) scale runs from CSP 1 to CSP 10. Grinding typically produces a CSP 2 profile, while light shotblasting produces CSP 4. The appropriate CSP range depends on the specific coating system being applied.
Excellent Coatings International specifies a surface profile of 5.0–10.0 mil for adequate adhesion. Acid etching alone — a common DIY shortcut — may not reliably achieve or maintain the required profile on contaminated or previously coated concrete. Mechanical grinding with a diamond grinder is generally the more consistent approach.
Step 4 — Repair Cracks and Concrete Damage
Cracks, pits, and spalled areas should be repaired before the epoxy basecoat goes down. Use a compatible concrete repair product and follow manufacturer specifications for cure time before coating over the repair. Skipping this step allows cracks to telegraph through the finished surface and can create points of future delamination.
Step 5 — Check Moisture and Environmental Conditions
Moisture is the single most common cause of epoxy adhesion failure. Excellent Coatings International specifies that moisture vapor emission must not exceed 3.0 lbs. per 1,000 sq ft per 24 hours, measured in accordance with ASTM E 1907-97. Do not apply coatings where high moisture content is present.
Maui’s humidity makes this step particularly important. Depending on the time of year and proximity to the coast, ambient relative humidity can be elevated even when the concrete surface appears dry. Rust-Oleum EpoxyShield technical data specifies application conditions of 60–85°F and humidity below 85%. Applying outside these parameters can compromise the coating’s bond and cure.
Check conditions in the morning before applying — concrete that sweated overnight from condensation is not ready for coating. Manufacturer environmental requirements should be followed without exception.
Step 6 — Apply the Epoxy System
Mix the epoxy components according to manufacturer ratios. Once mixed, most systems have a pot life of 1–2 hours, depending on temperature (Rust-Oleum EpoxyShield). Working in Maui’s heat can shorten that window significantly.
Work in manageable sections. Apply the basecoat evenly using a notched squeegee followed by a roller, maintaining consistent wet film thickness throughout. Avoid applying in direct sun on extremely hot days, as the concrete surface temperature can affect both open time and adhesion.
Adequate ventilation is required throughout application. Keep the garage door open and add fans where possible.
Step 7 — Add Flakes or Slip-Resistant Material
Decorative flakes are broadcast into the wet basecoat immediately after application. Beyond aesthetics, flakes provide a measure of surface texture. For garages exposed to Maui’s rain and tracked-in moisture, a slip-resistant aggregate mixed into or broadcast onto the resin coat can further improve traction (Concrete Decor, concretedecor.net). This is especially relevant for residential epoxy flooring in vacation rentals with high guest turnover.
Step 8 — Apply the Appropriate Topcoat
The topcoat seals the surface and determines the long-term performance of the system. In Maui’s UV-intense environment, a UV-stable polyaspartic coating is worth considering — polyaspartic topcoats are fast curing and UV stable, making them suitable where UV resistance is a priority (Sherwin-Williams). Standard epoxy topcoats can yellow and chalk under prolonged sun exposure. Discuss the topcoat options that suit your specific use case with your coating supplier or installer.
Step 9 — Allow the Floor to Cure
Dry time and cure time are not the same. A surface can feel dry to the touch within hours but remain chemically uncured for days. Rust-Oleum EpoxyShield specifies foot traffic return at 24 hours and vehicle traffic return at 3 days, under conditions of 70–80°F and 50% relative humidity. Cooler temperatures or higher humidity can extend these timelines.
Returning vehicles or heavy equipment to the floor before full cure can damage the coating permanently. Follow product-specific technical data sheet (TDS) guidance and err toward more cure time rather than less.
Is Epoxy Flooring Good for Maui Garages?
Garage epoxy flooring can perform well in Maui when the correct system is selected and properly installed. It resists oil and chemical spills, cleans easily after sand and dirt are tracked in, and can handle vehicle traffic when fully cured. A UV-stable topcoat addresses Maui’s intense sun exposure.
The limitations are real, too. High ambient humidity can complicate installation windows. Salt air may contribute to surface contamination that requires thorough cleaning before recoating. Garages without climate control may see more temperature and humidity variability, which affects both installation conditions and long-term performance. None of these are disqualifying factors — but they do require informed product selection and careful preparation.
Common Garage Epoxy Installation Mistakes
Most garage floor epoxy failures trace back to one of these causes:
- Skipping or rushing surface preparation, including insufficient profiling or incomplete degreasing
- Coating contaminated concrete, particularly surfaces with oil that has penetrated the slab
- Ignoring moisture, either in the slab or from ambient humidity at the time of application
- Incorrect mixing ratios or incomplete mixing of two-part epoxy components
- Working outside manufacturer-specified temperature and humidity conditions
- Using incompatible products across the primer, basecoat, and topcoat layers
- Returning the floor to service too early, before the system has reached full cure
DIY Epoxy vs. Professional Installation
| Factor | DIY | Professional |
| Surface prep capability | Limited to rental equipment | Industrial grinders, shotblasters |
| Moisture testing | Manual methods only | Calibrated testing (ASTM E 1907) |
| Product access | Consumer-grade systems | Commercial-grade coating systems |
| Application control | Variable | Controlled film thickness |
| Error risk | Higher | Lower with experienced crews |
| Cost | Lower upfront | Higher upfront, lower rework risk |
DIY installation can be appropriate for smaller garages with sound, dry, uncontaminated concrete and no previous coating. For garages with moisture concerns, prior coating failures, significant cracks, or oil contamination — common in Maui properties with heavy outdoor use — professional installation reduces the risk of adhesion failure.
Maui Epoxy Solutions works with both residential homeowners and vacation rental property owners across Maui. If you’re unsure whether your slab is a good candidate for DIY or professional-grade resistant epoxy coatings, we can assess the floor and give you a straight answer.
How to Maintain an Epoxy Garage Floor in Maui
Regular sweeping removes the sand and grit that accumulate quickly near the coast — abrasive debris left on the floor can dull the topcoat over time. Wipe up oil and chemical spills promptly. For general cleaning, a mild detergent and water solution works well. Avoid harsh acids, solvents, or abrasive scrubbing pads, which can damage the topcoat.
Inspect the floor periodically for chips, cracks, or areas showing wear. Catching damage early makes spot repairs more straightforward. A well-maintained epoxy floor can serve a Maui garage reliably for many years, depending on the coating system, installation quality, and traffic level.
Frequently Asked Questions
How do you coat a garage floor with epoxy?
Coat a garage floor with epoxy by cleaning and mechanically profiling the concrete, repairing any damage, confirming moisture levels are within manufacturer limits, and applying the epoxy system in layers — basecoat, optional flakes or aggregate, and a compatible topcoat. Allow the full cure period before returning the floor to vehicle traffic.
Can you epoxy an old concrete garage floor?
Yes, in most cases. Old concrete can be coated provided it is structurally sound, free of active moisture, and properly prepared. Existing coatings, oil contamination, and cracks all require treatment before a new system is applied.
How long does garage epoxy take to cure?
Cure time depends on the specific product and environmental conditions. Under typical conditions (70–80°F, 50% RH), Rust-Oleum EpoxyShield specifies foot traffic return at 24 hours and vehicle traffic return at 3 days. Higher humidity or cooler temperatures can extend these timelines.
How long does epoxy garage flooring last?
Epoxy garage flooring longevity depends on the quality of the installation, the coating system used, and the level of traffic and maintenance. There is no single answer. A professionally installed, properly maintained system in a residential garage can provide many years of service.
Can epoxy flooring handle Maui’s humidity?
When the product is selected and applied within manufacturer-specified conditions — including humidity below 85% and surface moisture within allowable limits — epoxy can perform well in Maui’s environment. Moisture testing and careful scheduling of installation are essential.
Is epoxy garage flooring slippery when wet?
Standard epoxy finishes can be slippery when wet. Broadcasting slip-resistant aggregate into the topcoat or basecoat layer can significantly improve traction, particularly in garages exposed to rain or water.
Why does garage epoxy peel?
Epoxy typically peels due to inadequate surface preparation, moisture in the slab at the time of application, oil contamination, incompatible product systems, or returning the floor to service before full cure. Preparation failures account for the majority of adhesion problems.
Get the Preparation Right — the Rest Follows
Coating a garage floor with epoxy is a process that rewards patience and precision. The coating itself performs the function. But whether it bonds, holds, and lasts is determined almost entirely by what you do before the first coat goes down — concrete condition, surface profile, moisture control, and environmental conditions at the time of application.
For Maui homeowners, those variables carry additional weight. Humidity, salt air, and UV exposure are conditions that every product selection and installation decision should account for.
If you want a professional assessment of your garage floor before committing to a coating system, contact Maui Epoxy Solutions. Tell us what the floor looks like, how it’s used, and what you’re hoping to achieve. We’ll give you a clear picture of what preparation it needs and which system is appropriate for your situation.