The Ultimate Guide to Flake Flooring Systems – Types and Benefits
July 1, 2024
Creative Color Options for Your Flake Epoxy Flooring
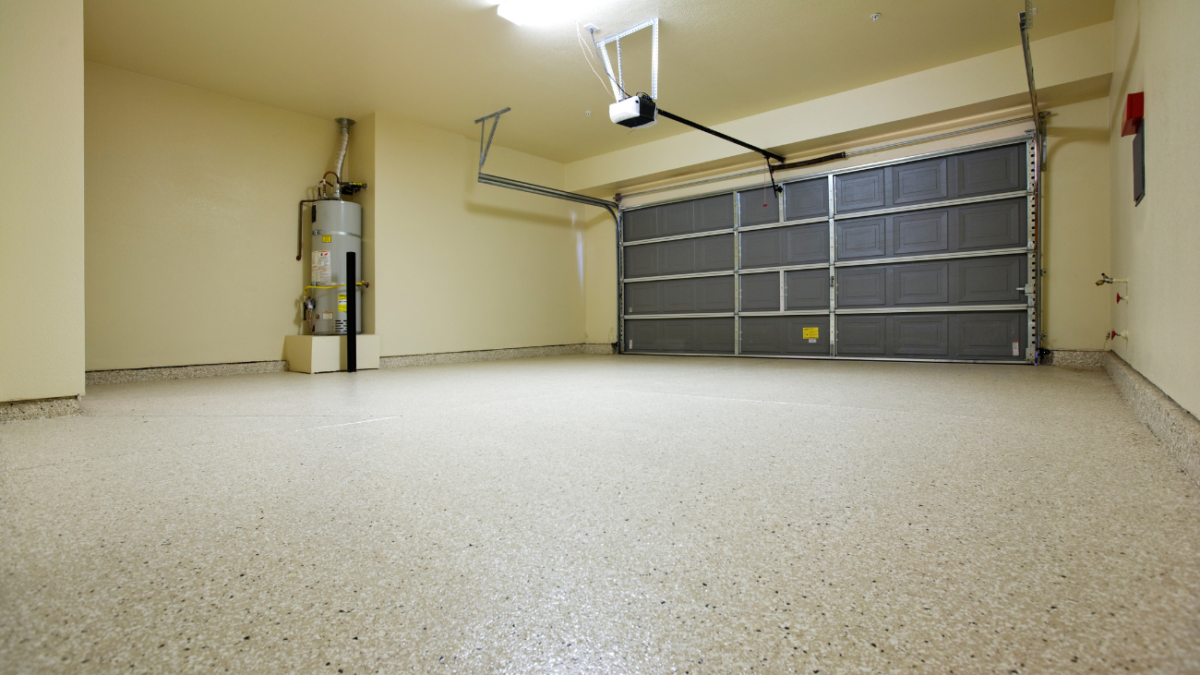
July 5, 2024Tired of that drab, cracked concrete in your garage? Epoxy flake flooring offers a revolutionary solution, combining stunning aesthetics with exceptional functionality. Imagine a garage floor that’s not only beautiful but also tough enough to handle anything you throw at it. Epoxy boasts unmatched durability, resisting scratches, chips, and even harsh chemicals commonly found in garages. Plus, the wide variety of colorful flakes allows you to personalize your space, creating a truly unique and eye-catching floor.
Installing epoxy flake flooring yourself might seem daunting, but with proper planning and preparation, it’s an achievable project.
The process involves several key steps: meticulously cleaning and prepping the garage floor, mixing and applying the epoxy base coat, incorporating decorative flakes, and finally, sealing the floor with a topcoat.
While it requires some effort, the end result is a stunning and long-lasting garage floor that will elevate your space for years to come.
Essential Prep for Your Epoxy Flake Garage Floor
Transforming your garage with epoxy flake flooring is an exciting project, but before you grab the mixing bucket, some crucial preparation is key. Here’s a breakdown of what you’ll need to ensure a smooth (and safe) installation process. Here are the tools and materials checklist!
- Epoxy Kit: The cornerstone of your project! Choose a high-quality kit suitable for garage floor applications. Consider factors like garage size and desired finish when selecting the kit.
- Decorative Flakes: Get creative! Flakes come in a vast array of colors and sizes. Estimate the amount needed based on your garage floor size and desired flake density (full coverage or a speckled look).
- Application Tools: Rollers (various nap sizes), squeegee, paint scraper, chip brush, mixing containers, and safety gear (gloves, respirator, goggles).
- Cleaning Supplies: Degreaser, concrete patch (for minor repairs), and a shop vacuum.
You Have To Understand The Cost Considerations:
- Epoxy kits vary in price depending on brand, coverage area, and desired features. Expect to spend anywhere from $200 to $500 for a typical two-car garage.
- Decorative flakes also range in price based on material and size. A good starting point is to budget around $50 to $100 for a standard garage floor.
- Factor in the cost of additional tools and cleaning supplies if you don’t already have them on hand.
Epoxy fumes can be irritating, so proper ventilation is crucial. Open your garage door and consider using additional fans for optimal air circulation. Wear gloves, a respirator, and safety goggles throughout the installation process to protect yourself from chemicals and dust.
Before purchasing your epoxy and flakes, accurately measure your garage floor’s square footage (length x width). Most epoxy kits specify coverage per gallon, so you can calculate the number of kits needed based on your garage size. Flake coverage also varies depending on the desired density, so consult the manufacturer’s recommendations for estimated flake usage per square foot.
By taking the time to gather the right tools, understand costs, prioritize safety, and accurately measure your space, you’ll set yourself up for a successful and rewarding DIY epoxy flake flooring project.
Step-by-Step Guide – Transforming Your Garage with Epoxy Flake Flooring
Ready to breathe new life into your garage floor? Epoxy flake flooring offers a stunning and durable solution, but achieving that polished finish requires careful preparation and execution. Here’s a step-by-step guide to walk you through the process:
- Garage Floor Preparation:
A successful epoxy flake application hinges on a meticulously prepared surface. Here’s how to tackle the crucial first step:
- Sweep away all debris and dust using a broom or shop vacuum. Next, thoroughly mop the entire floor with a degreaser solution to remove any oil, grease, or dirt that might compromise adhesion. Rinse the floor with clean water and allow it to dry completely (ideally for 24 hours).
- Inspect the floor for cracks and any uneven areas. For minor cracks, use a concrete patch specifically designed for bonding to existing concrete. Follow the manufacturer’s instructions for mixing and applying the patch. Ensure the repaired areas are completely dry and level before proceeding.
- For significantly uneven floors, consider grinding down high spots using a concrete grinder. This step is crucial for ensuring a smooth and aesthetically pleasing final epoxy finish. However, if the unevenness is minimal, focus on repairing cracks and proceed with the next steps.
- Degreasing Oil Stains:
Oil stains are the enemy of adhesion. If your garage floor has stubborn oil stains, address them before applying the epoxy. Here are some methods:
- Use a degreaser specifically formulated for concrete. Apply it according to the manufacturer’s instructions, paying particular attention to the stained areas. Scrub vigorously with a stiff brush and rinse thoroughly with clean water. Repeat if necessary.
- In a well-ventilated area, generously cover the oil stain with absorbent kitty litter. Allow it to sit for several hours, absorbing the oil. Dispose of the used litter properly and clean the area with a degreaser solution.
- Mixing and Applying the Epoxy Base Coat:
Now that your canvas is clean and prepped, it’s time to unleash the magic of epoxy!
- Carefully follow the manufacturer’s instructions for mixing the epoxy components (resin and hardener). Most kits require precise ratios, so use measuring tools for accuracy. Mix thoroughly for the recommended time to ensure proper activation of the epoxy.
- Starting at the furthest corner from the exit, begin pouring the mixed epoxy onto the floor. Use a squeegee to spread the epoxy evenly across the floor in a thin, consistent layer. Work in manageable sections, ensuring the entire floor is covered.
- Adding Flakes As A Touch of Decorative Flair
Here’s where your garage floor truly comes alive!
- While the epoxy base coat is still wet (refer to the manufacturer’s recommended window for flake application), begin broadcasting the decorative flakes. There are various techniques; some people prefer to sprinkle the flakes by hand, while others find throwing them in the air for a more even distribution works best. Experiment to find a method that suits you.
- The amount of flakes you use determines the final look. For a full flake coverage, apply generously until the epoxy base coat is barely visible. For a more speckled effect, use a lighter hand, allowing more of the base coat to show through.
- Scraping and Rolling:
Once the flakes have settled, it’s time to ensure a flawless finish:
- Use a paint scraper to gently remove any excess flakes that haven’t adhered to the epoxy. Be careful not to gouge the base coat.
- Use a spiked roller specifically designed for epoxy applications to roll over the entire floor surface. This step helps remove trapped air bubbles and ensures the flakes are fully embedded in the epoxy.
- Applying the Topcoat:
The final layer adds protection and a beautiful shine to your new floor! Once the base coat and flakes have cured according to the manufacturer’s instructions (typically several hours), it’s time for the topcoat. Similar to the base coat, follow the manufacturer’s instructions for mixing and application. Use a roller to spread the topcoat evenly across the entire floor.
- Drying and Curing Time:
Resist the urge to walk on your brand-new epoxy floor! Allow it to cure completely for the recommended timeframe specified by the manufacturer (usually 24-72 hours). During this time, maintain proper ventilation in the garage to allow any remaining fumes to escape. Once fully cured, your garage floor will be ready for years of wear and tear, showcasing its stunning aesthetics and exceptional durability.
Bonus Tip: For extra protection and a high-gloss finish, consider applying a second coat of topcoat after the first coat has fully cured.
Helpful Tips And Solutions To Common Challenges Faced During Installation
Even the most meticulous DIYer can encounter minor hurdles during epoxy flake installation. Here are some helpful tips to navigate common challenges and ensure a flawless finish:
- Worried about uneven spreading of the epoxy base coat? Work in smaller sections at a time, pouring and squeegeeing the epoxy in a controlled manner. A long-handled squeegee provides greater leverage for a smoother finish.
- Act quickly! Scrape up any spilled epoxy before it cures with a putty knife or paint scraper. For stubborn spills, dampen a rag with solvent (check the epoxy kit instructions for compatible solvents) and wipe the area clean.
- Those pesky air bubbles can disrupt the visual appeal. Use a spiked roller consistently throughout the application process to eliminate trapped air bubbles. If you notice bubbles after rolling, carefully use a small torch (set on low) to skim the surface and pop them without damaging the epoxy.
Remember, patience is key! Allow ample drying time between each step and strictly adhere to the manufacturer’s recommended curing time before walking on your new floor. By following these pro tips and prioritizing meticulous execution, you’ll be well on your way to achieving a professional-looking epoxy flake garage floor.
Aftercare and Maintenance To Keep Your Epoxy Floor Looking Flawless
The beauty of your epoxy flake floor doesn’t stop after installation. With proper care, you can ensure it maintains its stunning aesthetics and exceptional durability for years to come.
- Regular cleaning is crucial for maintaining a pristine epoxy floor. Sweep away dirt and debris with a soft-bristled broom or use a dust mop for everyday cleaning. For tougher messes, use a damp mop with a solution of warm water and a gentle, pH-neutral cleaner specifically formulated for epoxy floors. Avoid harsh chemicals, abrasive cleaners, or scouring pads, as they can damage the epoxy’s surface.
- To maintain the floor’s shine, consider applying a coat of high-quality floor wax designed for epoxy surfaces every few months. Follow the product instructions for application and buffing for a renewed luster.
If you follow these easy cleaning and upkeep tips, you can make sure that your epoxy flake floor remains the focal point of your remodeled garage, providing both practicality and eye-catching design.
Conclusion: Doing Epoxy Flake Flooring On Your Own
With meticulous preparation, careful execution, and a touch of patience, you’ve successfully transformed your garage floor! The result: a stunning and durable space that not only looks amazing but is also resistant to the wear and tear your garage typically endures. The pride of accomplishing a DIY project like this is truly rewarding. Imagine parking your car on a floor that not only protects your investment but also reflects your personality with its unique flake design. The satisfaction is unmatched!


